
Are you tired of staring at that cracked tile every time you walk into the kitchen? If so, it’s time to roll up your sleeves and dive into the world of tile floor repair. With the right approach, even the most unskilled DIYer can transform floor woes into wins. In today’s guide, you’ll learn some straightforward techniques that will make fixing those pesky tiles easier than you thought possible.
Armed with experience and a flair for home improvement, this post will walk through the essentials to tackle loose floor tile repair and more. Expect to come away with practical tips that can save time, money, and the hassle of professional intervention. Let’s get our hands dirty and those tiles flawless!
Master Simple Repair Techniques
-
Diagnose the Damage: Identify Your Tile Trauma
Before you begin any repairs, it’s crucial to assess the damage. A loose tile could stem from a weak adhesive, while a cracked one may result from an impact or a subfloor issue. Gently tap on the surrounding tiles. If they sound hollow, you’ve got a case of adhesive failure on your hands. Understanding the issue at its core is the first step to an effective loose floor tile repair.
-
Gather Your Gear: The Right Tools for the Task
To successfully execute a floor tile repair, you’ll need the following tools: a chisel, a hammer, adhesive, grout, and a matching tile if a replacement is necessary. Don’t forget safety goggles to keep those peepers safe! Quality tools don’t just make the job easier; they help ensure a finish that looks like it was done by a pro.
-
Out with the Old: Removing the Culprit
If it’s a replacement job, start by removing the grout around the damaged tile using a grout saw. Once you’ve cleared the grout, gently work the chisel under the tile. Take it slow; haste can damage neighbouring tiles. With the broken tile out, clean the cavity thoroughly—any residual adhesive will prevent the new tile from sitting flush.
-
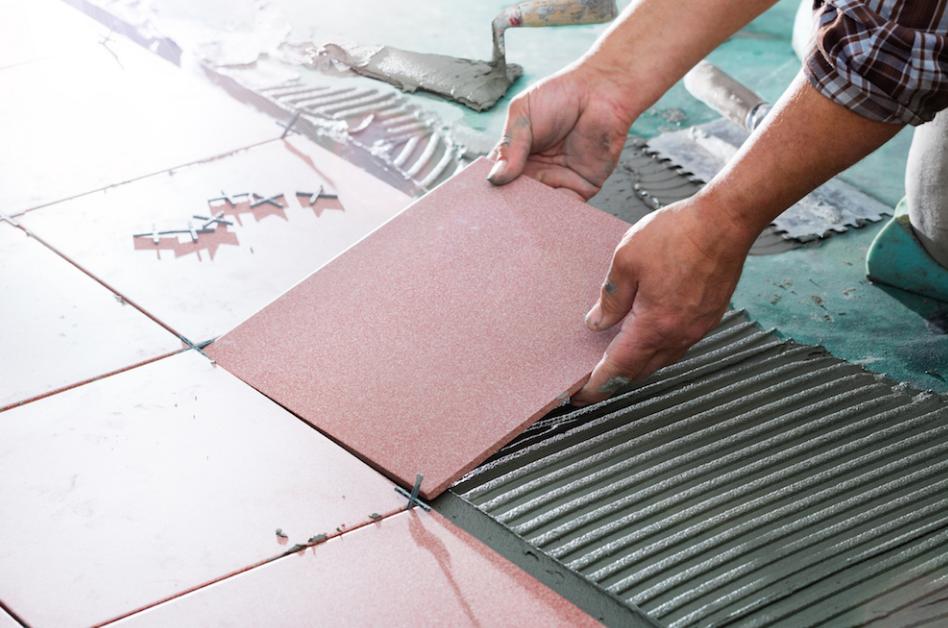
In with the New: Securing Your Tile
Spread adhesive on the back of the new tile or into the cavity—whichever is recommended for your tile type. Press the tile down firmly, ensuring it’s flush with its neighbours. Wipe away any adhesive that oozes out before it dries.
-
Finishing Touches: Grouting for Greatness
Mix your grout to the consistency of peanut butter and fill the gaps around the tile. Use a grout float to press the grout in and then wipe away the excess with a damp sponge. Allow the grout to dry according to the manufacturer’s instructions, usually 24 hours, before walking on the tile.
When to Call in the Experts
Despite the thrill and satisfaction that comes with DIY repair, some situations call for the expertise of a professional. If you’re dealing with extensive damage, tiles that repeatedly loosen despite correct floor tile repair, or issues stemming from the subfloor, a professional can offer a comprehensive solution. Experts have the tools, techniques, and experience to diagnose deeper problems and execute repairs that not only look flawless but also endure the test of time. Additionally, they can guarantee the work, giving you peace of mind that the problem is truly solved.
In Summary
Master simple tile floor repair techniques and tackle the challenge of repairing cracked tile floors with ease. By learning how to diagnose, remove, replace, and grout tiles, not only do you maintain the integrity and appearance of your flooring, but you also gain the pleasing sense of accomplishment that comes with DIY success. Approach each step with diligence and care; patience and accuracy are the keys to a seamless loose floor tile repair. With the right approach, your floor will look as if a professional handled it, leaving no sign of prior damage. Now, grab your tools and take pride in breathing new life into your home’s tiles. Happy fixing!