
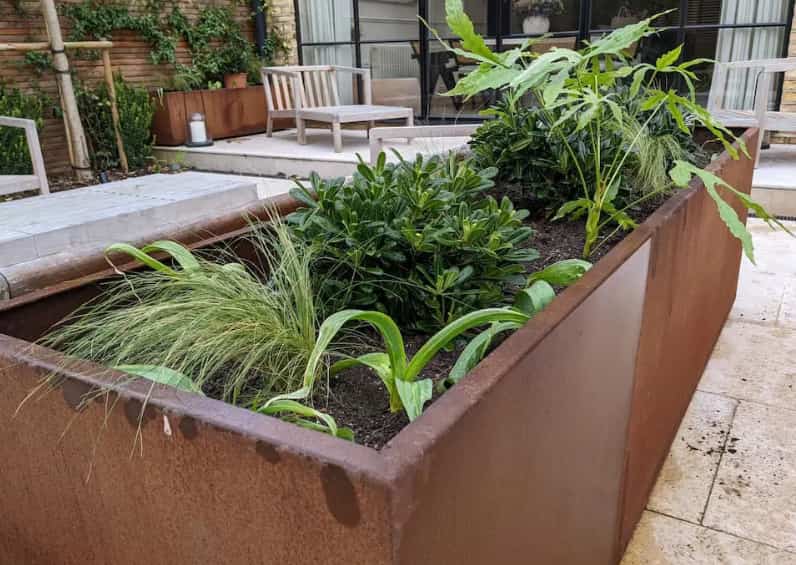
Installing corten steel planters can transform your outdoor space, adding an elegant, rusted aesthetic that beautifully blends with nature. These planters are durable and require minimal maintenance, making them an excellent choice for any garden enthusiast.
Follow this step-by-step guide to ensure a seamless installation process.
Step 1: Choose the Right Location
Before you begin, it’s essential to select the ideal spot for your corten steel planters. Consider factors such as sunlight, drainage, and proximity to water sources. Ensure that the location provides enough space for the plants to thrive without overcrowding. Additionally, assess the surface; it should be level to prevent water pooling.
Step 2: Gather Your Tools and Materials
For a successful installation, gather the necessary tools and materials, including:
- A level
- A shovel
- A garden fork
- Gravel or drainage stones
- Soil mix suitable for your plants
- Your chosen corten planter box
Step 3: Prepare the Site
Clear the selected area of any debris, grass, or weeds. Use the shovel to create a planting area that is slightly larger than the base of the planter boxers. This will ensure stability and provide room for any drainage materials. Aim for a depth of around 10-15 cm to accommodate drainage stones.
Step 4: Create a Drainage Base
To enhance drainage, layer gravel or drainage stones at the bottom of the hole you’ve dug. This step is crucial as it prevents water from accumulating, which can lead to root rot. A depth of about 5-7.5 cm should suffice, ensuring that the soil above remains well-drained.
Step 5: Position the Corten Steel Planter
Carefully lift your corten steel planters and position them in the prepared area. Use a level to ensure they sit evenly. Adjust the base as necessary to achieve balance. Once in place, backfill around the sides with the soil mix, firmly pressing it down to eliminate any air pockets.
Step 6: Plant Your Chosen Flora
Now that your planter is securely in place, it’s time to add your plants. Choose species that suit the sunlight and soil conditions of your location. Make small holes in the soil, place the plants, and cover the roots thoroughly with additional soil.
Step 7: Water and Maintain
Finally, water your newly planted garden thoroughly. Monitor the soil moisture regularly, ensuring it remains consistent but not overly saturated. With minimal effort, your corten steel planters will age beautifully, enhancing the natural charm of your outdoor space. Enjoy the transformation!
Conclusion
Installing corten steel planters is a rewarding process that enhances your outdoor space. With proper placement and care, these planters will not only provide visual appeal but also support healthy plant growth for years to come.